May 14, 2026
Audio Dropouts While Recording in Your DAW? A Few Windows Settings You Might Be Missing
Windows audio optimization basics — settings that often get overlooked.
Hello, I'm Hyunwoo Park (Banju) from Vilm.
It's been just over a month since I released Vilm Care, a Windows optimization tool for musicians and creators. I'm grateful for the response — more attention and support than I expected — and it confirmed that this kind of struggle and need is shared by many people around the world.

With that in mind, I'd like to take this chance to write more in-depth about optimizing your Windows environment for audio work — something I couldn't fully cover on the product page.
Have you ever run into any of these?
Audio dropouts or crackling during recording
CPU meter spiking abnormally high
Unstable audio when live streaming with OBS while running a DAW
Your audio interface dropping out or behaving inconsistently from time to time
You're new to music production or live streaming on Windows
You'd like to optimize or improve your setup, in any direction
If you're running into these issues despite having a reasonable buffer size and a proper audio interface connection, the following may help.
* If your setup is already running smoothly without noticeable issues, feel free to just skim through.
Before Diving into Windows Settings: The Basics
1. Audio Interface USB Connection (for Desktop PCs)
Always connect your audio interface to a USB port on the rear of your PC. Front USB ports reach the motherboard through internal cables, making the signal path longer and the power delivery less stable.
2. Appropriate Buffer Size
Live performance, recording: Generally 64–256 samples for low latency.
Mixing and mastering with many tracks, or when latency isn't critical: 512 samples or higher.
3. Audio Interface Driver
Always download the driver for your audio interface from the manufacturer's website. The driver Windows installs automatically can differ from the dedicated driver the manufacturer provides. The latest version is recommended.
Still Having Issues After the Basics?
There are a few optimization items worth looking at — most of them relate to Windows' power management settings.
Windows isn't designed with real-time audio processing as a priority (then again, no OS really is). In particular, the default power-related settings are tuned for efficiency and energy saving.
This isn't because audio work demands enormous power. It's because these power-saving settings can intermittently interfere with real-time processing. For example, a USB controller entering and waking from a power-saving state can cause a brief signal dropout, and the tiny delay it takes for a CPU to return from an idle state can throw off audio processing timing.
Shifting these toward a "use sufficient power" direction is the first step.
Key Items
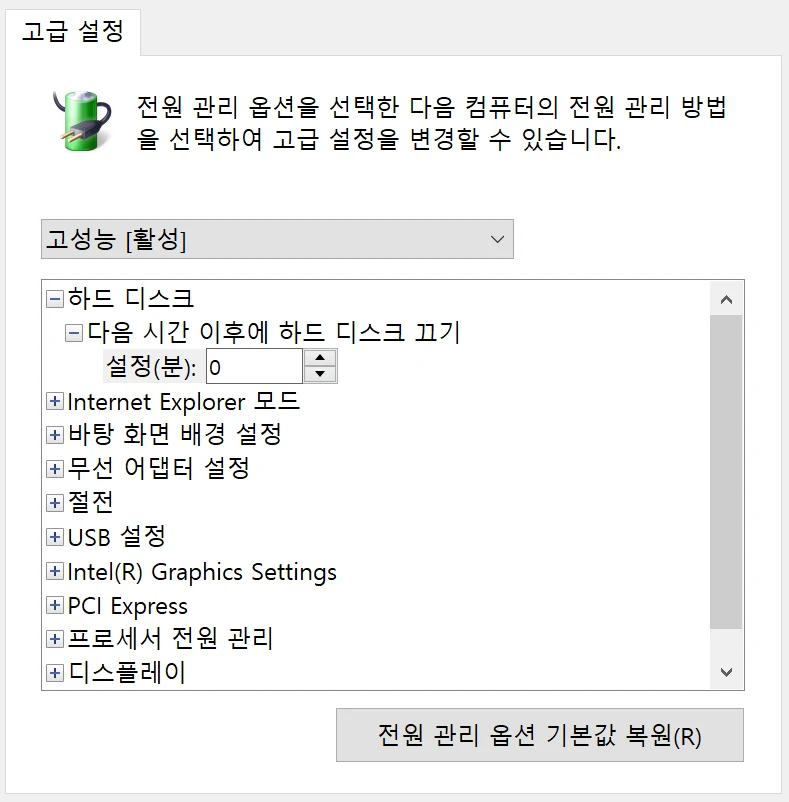
Power Options (switch to High performance or Ultimate Performance) → Control Panel
Advanced power settings (Minimum processor state, USB selective suspend setting, PCI Express Link State Power Management, Turn off hard disk after, etc.) → Control Panel > Power Options > Change advanced power settings
Disable USB controller power saving (uncheck "Allow the computer to turn off this device to save power") → Device Manager > Universal Serial Bus controllers > Properties of each item > Power Management tab
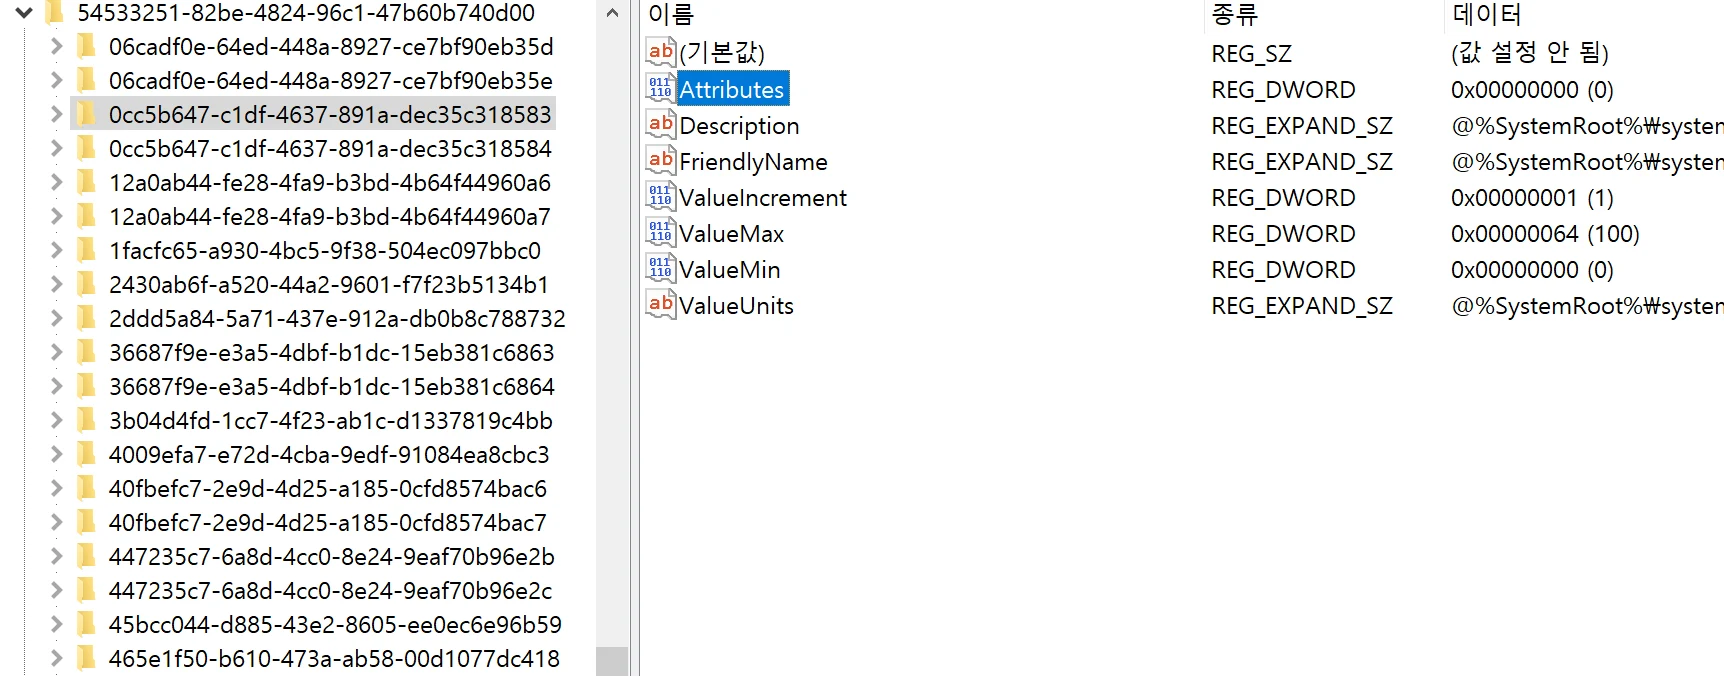
Disable CPU Core Parking (mainly applies to Intel) → Registry Editor


These are all set toward power saving by default, and simply switching them toward "use sufficient power" can bring meaningful improvement. It's also fairly well-known advice in the Windows-for-audio community.
That said, applying these by hand can be tedious for beginners. You may need to change specific values in the Registry Editor, or open each USB controller in Device Manager one by one and toggle the Power Management tab settings. Even people who are familiar with this stuff often miss an item or two.
Vilm Care lets you apply all of this with just a few clicks.
The 'Optimization' tab in the app covers all of the settings above, and you can revert to the original values at any time. The 'Optimal' / 'Not Applied' indicators let you check your PC's current state at a glance.
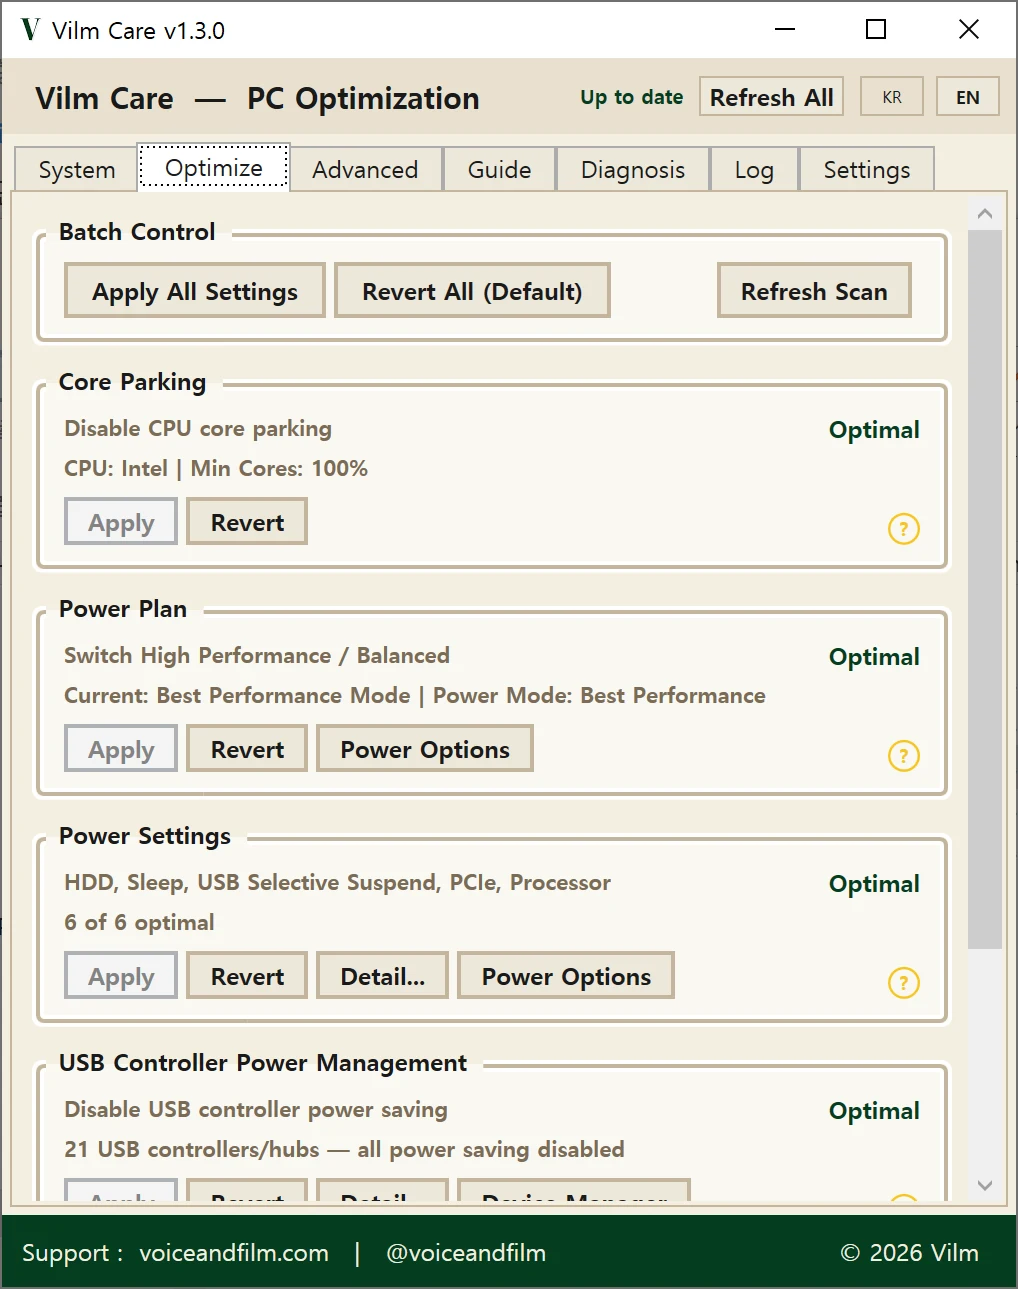
* Personally, I recommend applying all the items in the 'Optimization' tab on a desktop setup. Power consumption may increase slightly, but the difference is negligible.
If That Still Doesn't Solve It
Even after all of this, you may not get the result you were hoping for. Sadly, PCs don't always behave exactly as you'd expect.
There are still more things you can try, though they call for a bit more care.
Just like Windows defaults, BIOS settings often aren't tuned for high-performance real-time processing either. That said, BIOS environments differ significantly across motherboard manufacturers, so a one-size-fits-all guide isn't really possible — terminology and options can vary by vendor.
Generally Recommended BIOS Settings
Update BIOS first: Check your manufacturer's page for the latest BIOS and install it.
C-State: Set to C0 or C1 (prevents transitions into deeper sleep states)
Platform Power Management: Disabled
PCIe ASPM (Active State Power Management): Off (disable at the BIOS level too, separately from Windows power settings)
EIST / SpeedStep: Disable recommended (CPU clock fluctuations in real time can affect audio processing timing. That said, with recent CPUs combined with a 'High performance' power plan, the impact can be minimal.)
There are other recommendations such as Hyper-Threading, but BIOS adjustments depend heavily on your specific environment. I recommend approaching them as a secondary step, after Windows settings.
You can also find related information in Vilm Care's 'BIOS Guide' tab, and this section will continue to improve in future updates.
I sincerely hope you can focus purely on your work. Vilm is with you.
Thank you.